Activation
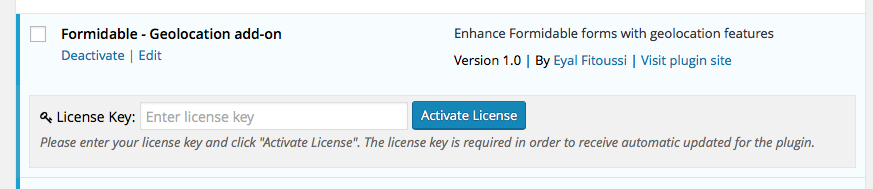
Once you have Formidable Geolocation add-on installed and activated, it is recommended that you activate the license key provided to you when you purchased the plugin. If you do not remember or lost the license key you can retrieve it from your Purchase History page. The license key will provide you with support and automatic updates for Formidable Geolocation add-on.
To enter the license key go to the plugins page of the website’s dashboard.
Formidable Geolocation Setup
Adding the geolocation elements to any of your forms is as simple as adding any other Formidable form fields:
First, navigate to the form builder of one of your existing form ( or create a new form ) where you will see the new fields buttons created by Formidable Geolocation add-on; Address, Locator button, Google map and Geocoder. You can add as many geolocation fields as you wish just like any other form fields.
Before I go into details and explain about each geolocation field it is important that you understand how to make the fields work properly.
You can add the address field, locator button or google map fields to the form and they will work just fine. However, the important thing is to sync ( or group ) between the fields and make them work together and geocode the location properly.
What does syncing ( or grouping ) between the fields means?
Say, for example, that we have a form with an address field, locator button and Google map. And we want that each time that the front-end user drags the marker on the map the address field will be dynamically populated with the address returned from the map. And same goes vice versa; if the user manually enters an address or uses the address autocomplete to select an address, the map marker would dynamically set to the address that the user entered. Same applied to the locator button; if the user clicks the locator button and the browser successfully detects his current position, both the map and the address field would dynamically set with the current location returned from the browser.
The field that responsible for the syncing described above is the Geocoder field; The Geocoder field will not only sync between the other geolocation fields but will also perform a complete geocoding for the address entered or found via the map or locator button.
You can create unlimited groups of an address field, Google map and locator button. It doesn’t have to be all three fields. It can be a map only, map and address field, locator button and map and so on.
This way, for example, you can create a form that allows the user to enter the addresses of two locations: home address and work place address. And you can present the user with an address field and a Google map for each of those locations. After form submission, you will see a complete, geocoded location information for each of the addresses entered by the user.
Basically, you can sync ( or group ) the different geolocation fields together using the geocoder field ID. You can add as many geolocation fields to the form and sync them using different geocoder fields.
Each geolocation field can only be synced to one geocoder. This means that you can group one address field, one locator button, and one map to a specific geocoder field. But you can create as many such groups as you wish.
Geolocation Form Fields Usage
The geolocation fields are just like any other Formidable form fields. You can add as many fields as you wish and you can place them anywhere in your form.
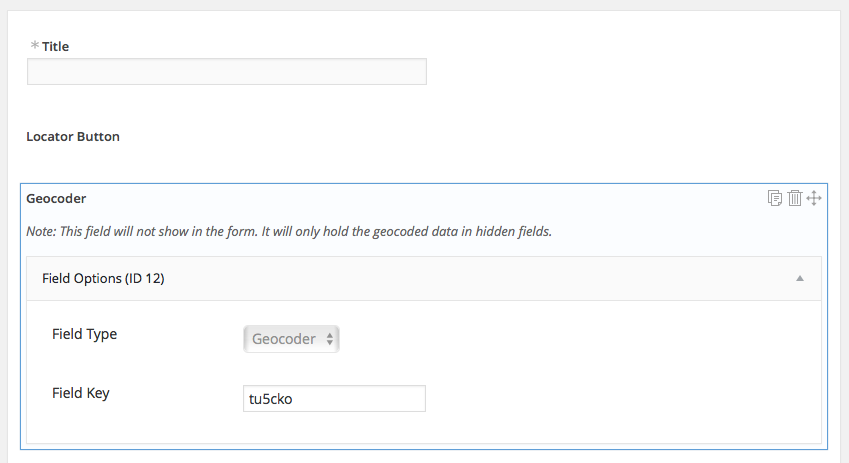
Geocoder Field
When adding geolocation fields to a form, it is always recommended to first add the Geocoder field. The Geocoder field is a hidden field and will not be seen by the front-end user. It doesn’t have any field options as well and Its main purpose is to sync between the other geolocation fields and to hold the geocoded information in hidden fields. The only thing that you need to pay attention to is the geocoder field ID as you will need it when settings up the other geolocation fields. In the image below, for example, the geocoder ID is 12.
Locator Button
The locator button provides the user with an easy way to retrieve his current position. It is an HTML button that once clicked it will trigger the browser and will try to retrieve the user’s current position ( using HTML 5 geolocation ). If the current position successfully found, it will be geocoded by the geocoder field. If an address field and or Google map are synced with this locator button they will be dynamically populated with the location returned by the browser.
Field options:
- Geocoder ID – enter the geocoder field ID which you’d like to sync the button with. For example, the image above of the geocoder field has the field ID 12.
- Button label – the label for the HTML button. For example, “Locate me”.
- Location found message – enter a message that will popup one the current location successfully found. For example, “Location found!”. You can leave the field blank if you do not want to display a message.
No items found.
Address Field
Using the address field button, the front-end user can enter an address that will then be geocoded by the geocoder field if synced with one. If the address field is also synced with a Google map, then the map marker will dynamically set to the position on the map that represents the address entered by the user. For the address field, you can also enable the address autocomplete feature and a locator button that will be placed inside the address field.
Field options:
- Geocoder ID – enter the geocoder field ID which you’d like to sync the button with. For this example, we are using the geocoder field from the image above which has the field ID 12.
- Enable Address Autocomplete – enable Google Places address autocomplete which provides the front-end user with live suggested results while typing an address. This way the user does not have to type the full address. Rather he can choose it from the suggested results.
- Restrict Autocomplete Results – You can restrict the suggested results to a single country by choosing the country from the drop-down menu.
- Enable Locator Button – Display a locator icon inside the address field that would serve the same purplse as the locator button describe above.
- Location found message – enter a message that will popup one the current location successfully found. For example, “Location found!”. You can leave the field blank if you do not want to display a message.
No items found.
Google Map Field
Using the Google map field, you can provide the user with another method for finding his desired location; That’s instead of or together with the address field and locator button. The front-end user can drag the marker anywhere on the map and the location, if synced with a geocoder field, will be geocoded. If the map also synced with an address field, the address field would then be populated with the address of the location.
Field options:
- Geocoder ID – enter the geocoder field ID which you’d like to sync the button with. For this example we are using the geocoder field from the image above which has the field ID 12.
- Map width – enter the map width in pixels or percentage. For example, 100% or 250px.
- Map height – enter the map height in pixels or percentage. For example, 100% or 250px.
- Latitude – the latitude of the default location that will be displayed when the form first loads.
- Longitude – the longitude of the default location that will be displayed when the form first loads.
- Map type – select between ROADMAP, SATELLITE, HYBRID or TERRAIN.
- Zoom level – Select the initial zoom level of the map.
No items found.
Output Location Field Options
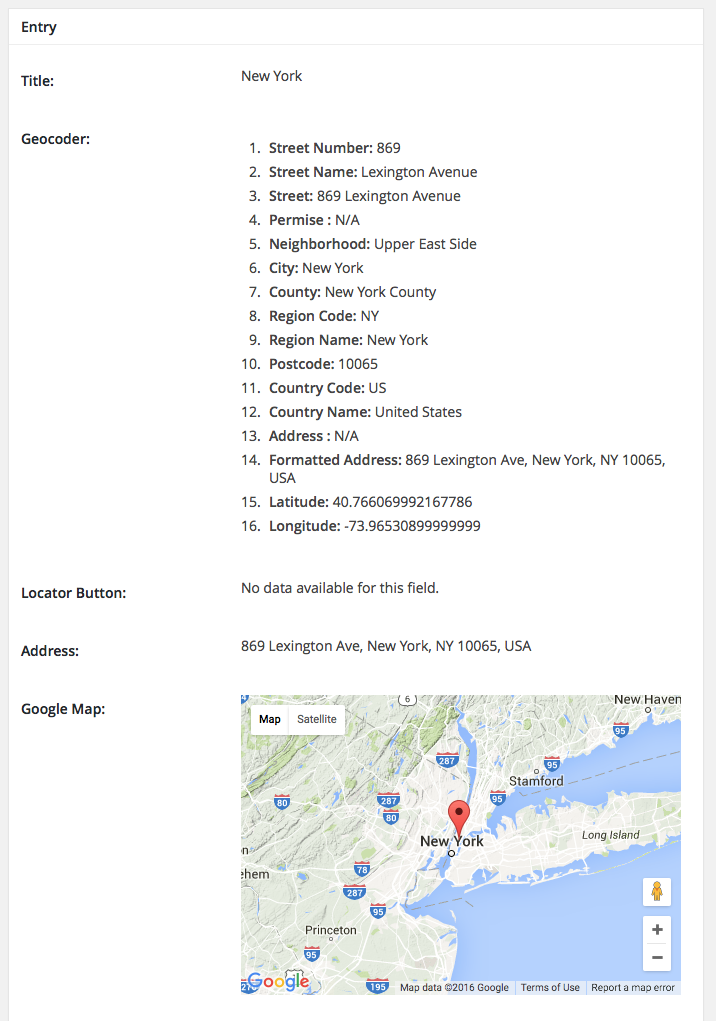
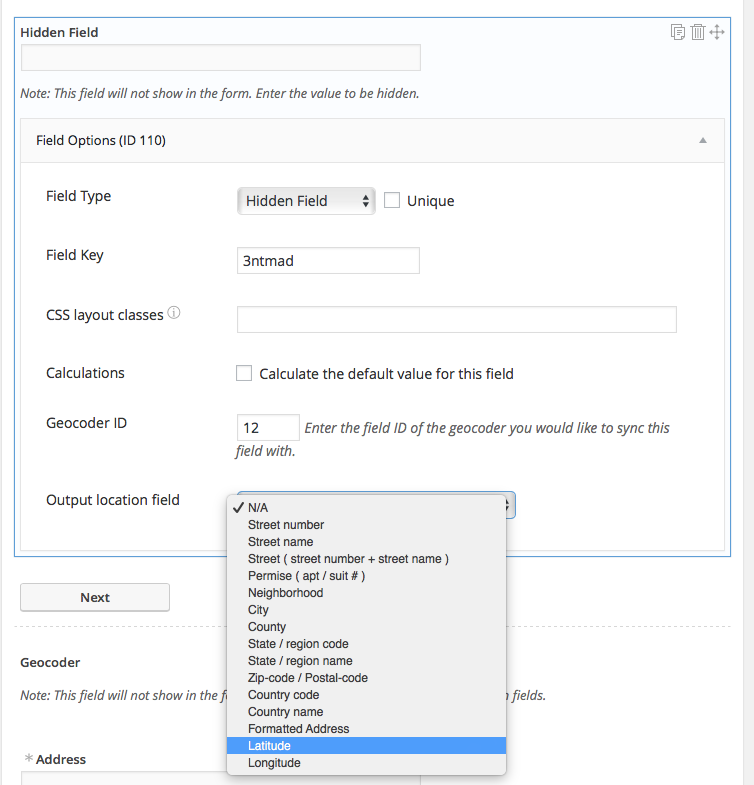
The output location field is another useful feature. This is a field option which attached to the single line text, checkbox, drop-down, radio buttons and hidden fields. Using this feature, you can create dynamic location fields that will be auto-populated with the selected address field each time a geocoding is taking place in the form.
Let’s say, for example, that you are using the formidable form to create posts and you would like to save the coordinates of an address in custom fields. This is what you can do:
- Add two hidden fields to the form.
- For one field select “latitude” from the “Output location field” select box and for the other field select “longitude”.
- For both fields enter the geocoder field ID which you would like to sync them with.
- In the form settings page -> “Form actions” tab -> Create Post section you need to set the two hidden fields to be saved as custom fields.
Now, each time the front-end user uses any of the geolocation fields ( locator button, address field, or Google map ) that are synced with the same geocoder field, The coordinates would be dynamically populated in the hidden fields. And once the form is submitted the value of the hidden field would be then saved in custom fields.
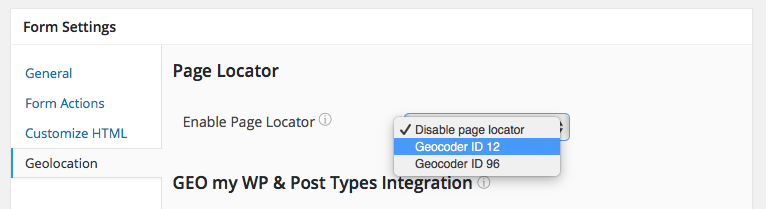
Page Locator
The page locator feature works the same way as the locator button ( that was described above ) does; It will try to retrieve the user’s current position and geocode it. The only difference is that it will be triggered automatically when the form first loads.
To enable the page locator feature, navigate to the form settings page -> Geolocation tab and choose the geocoder field ID that you would like to sync the page locator with from the “Enable Page Locator” select box. Then click “Update” to save the changes.
GEO My WP Integration
If you are using GEO my WP plugin you can easily integrate it with your Formidable forms. The integration is available when creating/updating post types and or users. Which means, that post types and users created/update via the Formidable form will be searchable via GEO my WP’s search forms.
To enable the integration with GEO my WP plugin navigate to the form settings page -> geolocation tab and set up the post types and user registration sections as you wish.
